This looks like a lot, but it’s not. Just making the process super-duper clear. 😉
Step 1: Download and Install the Unity Hub (available on Mac and PC).
The Unity Hub is a standalone application that streamlines the way you find, download, and manage your Unity Projects and software installations. Read more about the Unity Hub here.
- In a new tab, either Google “Download Unity Hub” or go to https://unity3d.com/get-unity/download, and then click Download Unity Hub.
- From your Downloads folder, double-click on the Unity Hub Setup file to begin the installation. (If on a Mac, drag the application into your Applications folder, then double-click on it.)
- Agree to Unity Terms of Service and follow the instructions to install Unity Hub.
- Open Unity Hub for the first time.
PC Instructions available via the first video on this page.
Step 2: Download and install Unity version 2021.1.16
There are many different versions of the Unity software, as its developed and released over time. During this workshop, we’ll be using version 2021.1.16f1.
- In the Installs tab, click Add to add a new Unity version.
- Choose 2021.1.16f1
- Choose to install Visual Studio (for Mac or PC) and Android Build Support
- Accept any necessary terms and conditions and begin installation.
Step 3: Create a Unity ID.
- From the Account menu in Unity Hub, click to Sign in.
- If you already have an account, sign in. Otherwise, you can create a new Unity ID.
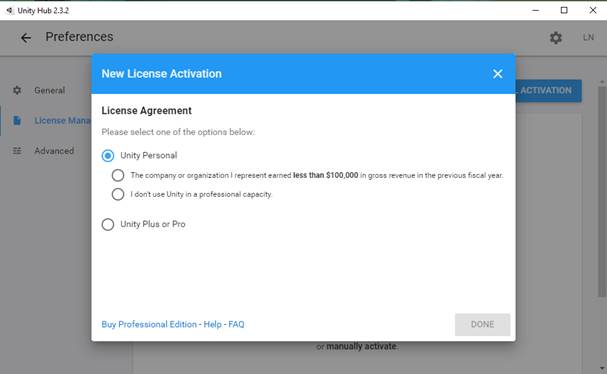
You may receive a notice about needing to activate a license. You can do this under the settings menu (click the cog in the upper-right corner). From there, you can click License Management in the menu and choose a personal license.

Step 4: Download and import the workshop package.
Just download this file. Create a new Unity project and import the package. This video shows you how to import the package.
Step 5: Bring a Mouse if you have one!
You do not need a mouse to participate, but it will be very helpful. Otherwise, please be prepared to right-click on your computer’s track pad.
