
3D modeling can seem like something for just the professionals with fancy equipment, expensive programs, and hours upon hours of time. What if I told you that you could do 3D modeling using Blender on your own laptop, for free, and create a starter project in under an hour? Blender is a free and open-source 3D computer graphics software tool set used for creating a wide variety of things. With the models you create in Blender, you could go on to create animated films, 3D printed models, computer games, and even things in virtual reality.
I started learning Blender in Fall of 2020 through a class offered at the University. As a Creative Writing major, I never would have guessed that I would one day learn to use a 3D modeling software. After being so used to creating things with words on paper and making the occasional doodle with pen on paper, the idea of creating in 3D seemed so foreign to me. I was initially taking the class to fill a requirement but realized that I enjoyed using Blender and 3D modeling quite a bit. I already enjoyed drawing and doing other forms of digital art, so Blender soon began to feel like the next natural progression for me once I was introduced to the software.
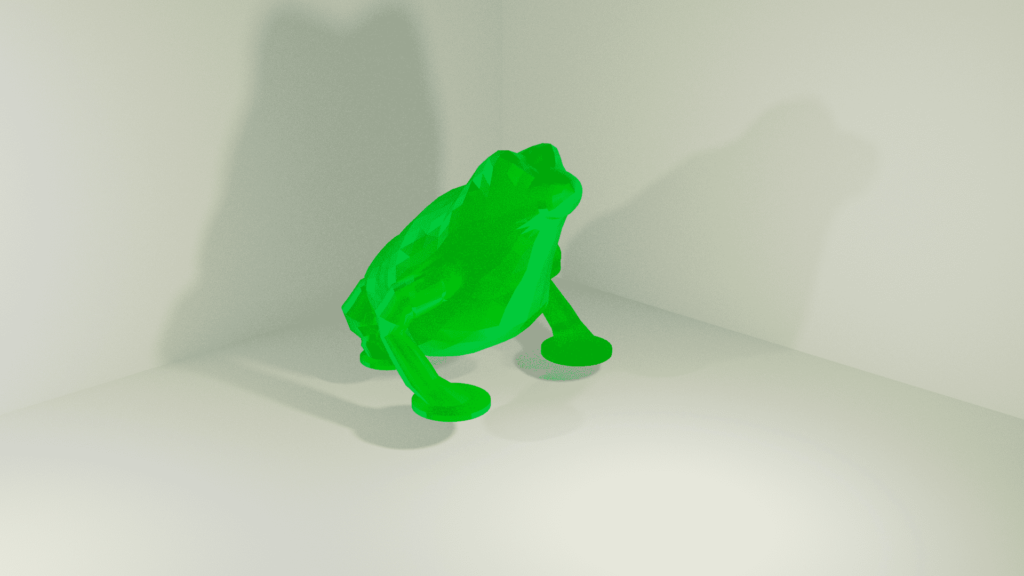
After taking the class and getting the hang of things, I proceeded to remove it from my computer’s home screen and didn’t think about it again. The class had been stressful, and I thought that I would never need to use the program again. When the Spring rolled around, however, I got my position at Studio X. As part of my training, I was asked to attend one of Studio X’s workshops to better understand our programming goals and approach to engaging new XR users. I chose to attend one on Blender, since I was at least familiar with the software. During this workshop, I created a frog:
This frog helped me become reinterested in Blender, and before I knew it, I was making all sorts of little projects in my free time. I realized that Blender was more fun than the class had let me realize, as in Blender, you can create anything you can imagine! Now I hope to inspire others to introduce themselves to the software so they can get creative in their free time.
If you are interested in getting started with Blender, you’re in the right place. This article provides 6 beginner blender tutorials ranging from easy difficulty for those getting started for the very first time, to a harder difficulty for those who want a challenge or are working their way through this list!
Tips to keep in mind as we go:
- When rendering your final projects, most of the tutorials recommend that you use Cycles. If you are doing this tutorial on a high-end desktop computer or at an innovation station in Studio X, that should be ok. If you are working from your own laptop, however, I would recommend sticking to Eevee, unless you have a super amazing laptop, otherwise you’ll be sitting there for hours waiting for it to render!
- Most but not all of these tutorials have varying versions of shortcut viewer in either the left- or right-hand bottom corner of the blender viewport. Shortcut viewer allows you to see which buttons the instructor is pressing in case they forget to mention it.
- The software may feel overwhelming, but as long as you remember to pause the video to follow along with the steps, it becomes quite manageable!
Easy
Blender 3D – Easy Lowpoly Car – Beginners Tutorial
This tutorial is great for people who are wanting to get an easy start in Blender. I was able to complete this tutorial in under an hour, and this does include all the times I paused to follow along. A few things that you might find a little hard to follow along with are the many shortcuts he uses but doesn’t take all that long to explain.
Adding Objects to the scene. He uses the shortcut Shift + A. If you find yourself forgetting this or would rather do it the long-handed way, you can instead go to the top left-hand corner of the screen where you will find the “Add” button. Hover over this and you will see the same menu.
Moving objects along an axis after duplication. This happened first when he is duplicating the wheels, and the command is Shift + D to duplicate. I was initially struggling with the “then press Y to move along the Y-axis, as what he doesn’t mention is that you release the “Shift + D” before hitting “Y.”
Other Notes to keep in mind:
I was having a little trouble with my Blender not showing me the colours that I was applying to my car, so to check, you can render out the image by going to the top left-hand corner and hovering over “Render” then selecting “Render image.” You may have to reposition the camera before this, though, as the rendering comes from what the camera sees [he explains cameras and positioning starting around 19:50]. The shortcut for rendering is F12.
The first part of the video [0:00-14:00] is all about the modeling, from [14:00-18:51] is all about the coloration of the car. From [18:51-end] he is playing around with the scene and lighting.
Here is the outcome I got when following along with the tutorial!

[2.8] Blender Tutorial: Simple Animation For Beginners
This tutorial provides the simplest introduction to animation that I’ve seen, and I think that it’s perfect for those just getting started. The instructor keeps to using very simple shapes, nothing more than several cubes and a plane. He doesn’t have the shortcut viewer on, but he explains everything step-by-step in a super easy-to-follow fashion. When something might be a little confusing, text appears on the screen with the instructions of what buttons to click. There were only a few instances in which I had to pause and squint at the screen to see which tab he’d clicked into. I was able to complete this tutorial in under 30 minutes, so it’s great if you only have a little bit of time!
Here is my animation result!
Medium
Rig your Own Ghost in Blender 3D for Halloween – EASY
This tutorial leans a little more to the medium-easy side. I would say that it’s pretty good overall, though the instructor goes through the steps quite fast and I found myself pausing a lot more often than I was in the “easy” tutorials. There are a few things he neglects to explain, so here are some of the things that stuck out to me the most!
[5:57] He magically transitions from Edit Mode to having the object be a pretty rainbow gradient. What he actually does is switch from Edit Mode to Weight Paint mode. He was able to tab into the mode due to his own personal settings, but here’s how you can do it: Go to the Upper left-hand corner of the screen to where you will likely see either “Object” or “Edit” mode. If you click this drop-down menu, you will see “Weight Paint” as an option.
[6:59] When pinning the ghost to the circle, make sure you click the ghost, then the circle, then ctrl +P (Order matters for a lot of things in blender!)
[7:10] When he says he’s going to grab the keyframe, there’s a small bar at the bottom of the screen in the center that has a little circle button (next to the play buttons). That button will grab a keyframe. You can also use the shortcut “I” which will prompt you to select which type of keyframe. For the purposes of this tutorial, just select “Location” in addition. When he moves the ghost over to pin a second keyframe, notice that you have to move the time bar across the bottom first, before moving the circle, otherwise it will just override the previous keyframe.
Note! At around timestamp 10:17, I the video gets a little harder. You have completed the ghost’s body at this point, but the video then moves onto texture painting. Though the video itself has only run for about 10 minutes by this point, a beginner should stop here as this part took me about 40ish minutes to complete.
Here is the outcome of my ghost! (I chose to simply colour in two squares for the eyes):
Hard
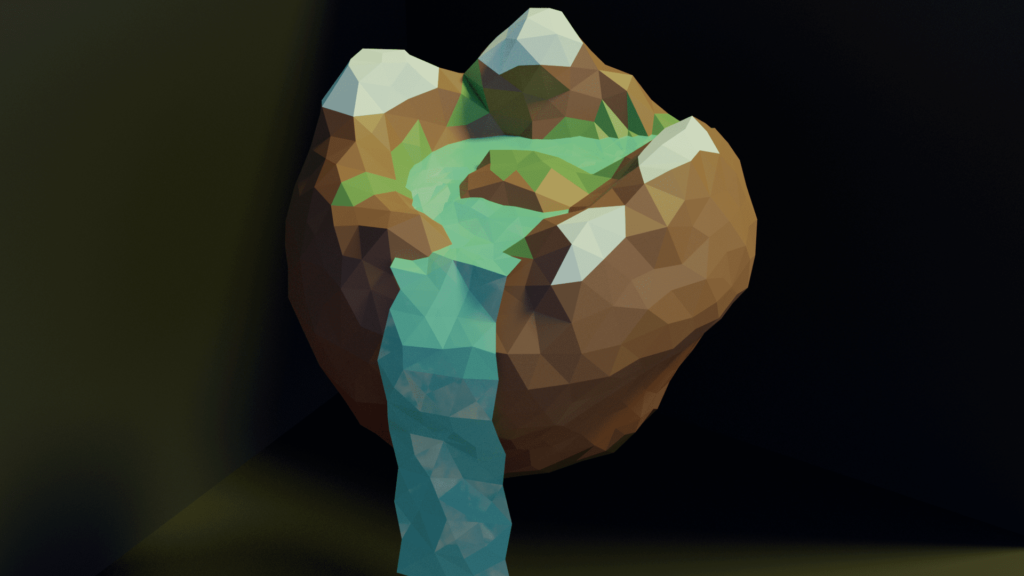
Low Poly Island | Beginner | Blender 2.8 Tutorial
This tutorial does a good job of explaining each step of the process. the reason I would rate it a bit harder is because of the use of Nodes for textures, which can be tricky to follow along with at times. If you want the tutorial to remain at more of a beginner level, I would recommend stopping around timestamp 19:30, as at this point you have an island with the water and everything is already shaded. From 19:30 onwards, he begins to add more details like trees to the island. Going past 19:30 would also probably put you well past an hour for time of work. I looked at the comment section below the video and saw many people saying that the entire tutorial took them between 4-5 hours. I was able to do the island and the water alone (with shading) in about 1 hour.
Things that might be confusing explained:
If you have the latest version of blender, set the resolution in the Dynotypo to 0.5 instead of 6! This is the new setting for low poly. If you put it to 6, it will be way too smooth!
10:34- Make sure you set the sun strength to something around 5-10! This is equivalent to the energy.
13:15 – He says to look at the blend settings. If you have a more up to date version of Blender, you will have to open the settings tab on the node editor.
14:21 – After you’ve selected “vertex paint” go to the shader editor window (where the nodes are). You should have already added a base material. Click Shift + A and then search for “Vertex colors” and add that. Connect the Yellow color dot to the base color yellow dot (that’s on the large green material node). Then change the color to the color name (default is Col, so select that). Then your color should start appearing. NOTE: He explains this later around 15:50, but you will have already completed it as the different versions work slightly different.
Here is my result!
Create Satisfying 3D Animations | Easy Blender Tutorial
This tutorial is simple, though a little confusing to follow along. There are some times at which I struggled a bit to follow along with what he was saying (there was a lot of pausing and restarting). Up until he starts adding the textures, a strong-willed beginner could complete this tutorial. Once he gets to the textures around timestamp 8:00, however, I might wait until you know a little more about Blender before you tackle that part! The only instance I was completely baffled was at timestamp 3:25. In order to extrude in the way he does, you have to hit “E” and then “S” for the scaled extrusion.
Here is my result!
Conclusion
My journey through learning Blender may be different from yours, but there’s no doubt that you’ll be able to get the hang of it in no time! You don’t need an entire semester-long class to learn to master the basics of Blender thanks to the many resources available on the internet. As long as you have a computer, at least an hour of time, and the motivation to create, I’m sure you will power through these beginner instructions.
As I followed through these tutorials for myself, I began relearning the things I had forgotten from the class that seemed to have happened so long ago. Now, I’m working to improve my skills a little bit every week. With my increasing experience with the software, I am hoping to lead an Advanced Blender workshop for those daring to take on the challenge! I definitely wouldn’t call myself an expert at the software, but I’m certainly more confident than I was when I started. You too could learn these skills, and maybe even one day become a Blender master!
To download Blender for yourself, visit their website! https://www.blender.org/download/
