This looks like a lot, but it’s not. Just making the process super-duper clear. 😉
Step 1: Download and Install the Unity Hub (available on Mac and PC) (~2 minutes)
The Unity Hub is a standalone application that streamlines the way you find, download, and manage your Unity Projects and software installations. Read more about the Unity Hub here.
- In a new tab, either Google “Download Unity Hub” or go to https://unity3d.com/get-unity/download, and then click Download Unity Hub.
- From your Downloads folder, double-click on the Unity Hub Setup file to begin the installation. (If on a Mac, drag the application into your Applications folder, then double-click on it.)
- Agree to Unity Terms of Service and follow the instructions to install Unity Hub.
- Open Unity Hub for the first time.
PC Instructions available via the first video on this page.
Step 2: Download and install Unity version 2021.1.16f1 (~10 minutes depending on your computer and internet connection)
There are many different versions of the Unity software, as its developed and released over time. During this workshop, we’ll be using version 2021.1.16f1.
- In the Installs tab, click Add to add a new Unity version.
- Choose 2021.1.16f1
- Choose to install Visual Studio (for Mac or PC) and Android Build Support
- Accept any necessary terms and conditions and begin installation.
Step 3: Create a Unity ID
- From the Account menu in Unity Hub, click to Sign in.
- If you already have an account, sign in. Otherwise, you can create a new Unity ID.
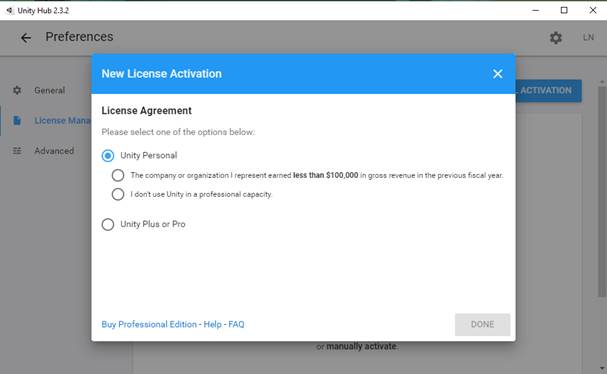
You may receive a notice about needing to activate a license. You can do this under the settings menu (click the cog in the upper-right corner). From there, you can click License Management in the menu and choose a personal license.

Step 4: Review the workshop handout.
The handout provides info about the Unity interface, key terms, and navigation tips.
